How to Build the Ultimate Home Chocolate Bar

A home chocolate bar is more than just a corner filled with treats, it’s a sanctuary for indulgence, a small personal retreat that celebrates the joy of cocoa in all its forms. Building one is both exciting and satisfying, offering the freedom to explore flavors, textures, and pairings that suit your personal taste. I discovered that it doesn’t take a professional chocolatier to pull off something impressive; all it needs is thoughtfulness, a bit of creativity, and a genuine love for good chocolate.
Planning the Perfect Chocolate Bar Space
Before anything else, it’s important to consider where your chocolate bar will live. I prefer a quiet corner of the kitchen or dining area, where light isn’t too harsh and the temperature stays cool. Chocolate doesn’t do well with direct sunlight or heat, it can melt or lose its texture quickly. A shelf or sideboard away from stoves and windows works perfectly.
If space is limited, a single cabinet or even a section of the pantry can become your chocolate haven. For those who like to showcase their collection, a small bar cart or glass-front cabinet can turn it into a decorative feature. I find that adding a tray or wooden organizer keeps everything neat and adds a touch of sophistication.
Selecting the Right Types of Chocolate
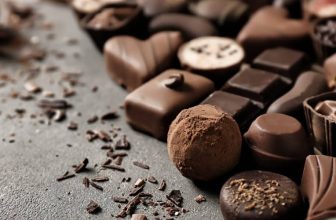
A true chocolate bar should have variety. I like to divide mine into four main categories: dark, milk, white, and flavored or infused varieties. Each type brings a distinct experience and caters to different moods or pairings.
Dark chocolate is the soul of the collection, offering depth and complexity. I like to include several percentages, from 60% up to 90% cocoa, so I can enjoy different intensities depending on the day. Milk chocolate adds a comforting sweetness, and I often pick brands known for their creamy texture and smooth melt. White chocolate, though sometimes underestimated, adds variety with its buttery sweetness and ability to pair beautifully with fruits and spices.
Flavored chocolate brings excitement to the mix. Bars infused with sea salt, chili, orange peel, mint, or coffee can surprise guests and keep tasting sessions lively. I also keep some artisanal or bean-to-bar options from smaller chocolatiers. These often highlight rare cacao origins and provide unique tasting notes that elevate the collection.
Adding Homemade Chocolate Treats
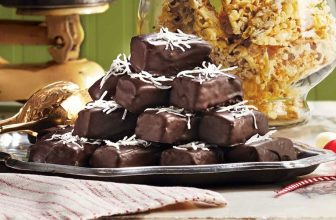
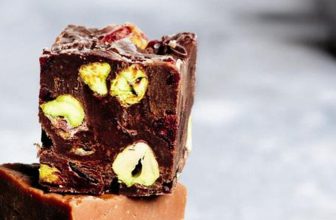
A chocolate bar isn’t limited to store-bought bars. I love including a few homemade items, like truffles, chocolate bark, or dipped fruits. These personal touches make the setup feel more inviting and customizable.
Chocolate bark is particularly easy to make. I melt high-quality dark chocolate, spread it thinly over parchment paper, and sprinkle toppings like nuts, dried berries, or coconut flakes. Once cooled and broken into rustic pieces, it looks impressive and stores well in airtight containers. Truffles, made with ganache and rolled in cocoa powder or crushed nuts, add a luxurious touch.
For a fun twist, I sometimes dip pretzels, marshmallows, or strawberries in tempered chocolate. Not only does it add color and texture to the display, but it also gives guests something interactive to enjoy.
Organizing for Presentation
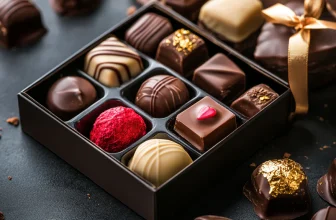
The visual appeal of a chocolate bar plays a huge role in the experience. I like to use glass jars, small bowls, and tiered trays to display different chocolates. Clear containers allow the rich colors of the chocolate to shine, while keeping everything protected from moisture.
For wrapped bars, I arrange them neatly in a small basket or wooden box. I sometimes tie a ribbon around them for a gift-shop aesthetic. Labeling can also help guests navigate through the flavors. Small chalkboard tags or handwritten cards that describe the origin or cocoa percentage make the tasting experience more engaging.
If you prefer a minimalist look, choose a monochrome color scheme, dark jars, wooden trays, and soft lighting can make the setup feel elegant and cozy.
Pairing Chocolate with Beverages
The magic of a chocolate bar extends beyond the chocolate itself. I like to offer drink pairings that enhance the tasting experience. Coffee and espresso are classics, their bitterness balancing the richness of chocolate perfectly. For something cooler, iced lattes or mocha milkshakes fit the theme without much effort.
Wine and chocolate pairings can also elevate the experience. A bold red wine like Cabernet Sauvignon complements dark chocolate beautifully, while sweet dessert wines like Port or Madeira highlight milk chocolate’s creaminess. For something lighter, sparkling wine with white chocolate is surprisingly refreshing.
If alcohol isn’t your thing, tea is an excellent companion. Earl Grey’s citrus notes bring out fruitiness in chocolate, while green tea provides a clean, earthy contrast. Even a cup of hot cocoa made from different chocolate blends can be part of the tasting experience.
Creating a Chocolate Tasting Experience
Hosting a mini tasting session adds a layer of excitement to your home chocolate bar. I like to start with lighter chocolates and progress toward darker varieties to avoid overwhelming the palate too soon. Guests can sample a small square, note the aroma, and let it melt slowly on the tongue to experience the full range of flavors.
Having a tasting sheet or small notebook available helps everyone jot down their impressions. It turns the evening into an interactive and memorable experience. I sometimes prepare palate cleansers like plain crackers or sparkling water between tastings to reset the senses.
To make it even more engaging, I group chocolates by region, say, cacao from Ecuador, Ghana, or Madagascar, and talk about how each origin influences the taste. It sparks conversation and appreciation for the craft behind every bar.
Including Chocolate Spreads and Sauces
A complete chocolate bar should also have options beyond solid bars. I keep a small section for spreads like chocolate hazelnut butter, cocoa almond cream, or pure dark chocolate ganache. These pair beautifully with bread, biscuits, or fruit slices.
Jars of homemade sauces or drizzles, such as caramelized white chocolate sauce or dark chocolate espresso syrup, can elevate the entire presentation. Small tasting spoons make it easy for guests to try them without making a mess.
For an extra layer of indulgence, I include a fondue setup for special occasions. A bowl of warm, melted chocolate surrounded by skewered fruits, marshmallows, and cookies turns any gathering into an instant celebration.
Storing Chocolate Properly
A well-maintained chocolate bar depends on proper storage. I learned that chocolate prefers cool, dry environments, ideally around 60 to 70°F. Too much humidity can cause sugar bloom, where white streaks form on the surface. Though harmless, it affects appearance and texture.
I avoid storing chocolate in the refrigerator unless absolutely necessary. If I do, I make sure it’s tightly sealed to prevent it from absorbing odors from other foods. Airtight containers are the best investment for keeping flavors pure and consistent.
Rotating the stock also helps ensure nothing goes stale. I mark the purchase dates on the packaging and use older chocolates first, though they rarely last long enough to become an issue.
Incorporating Chocolate Decor and Accessories
Beyond the edible side, I love adding decorative touches that reflect the chocolate theme. Cocoa pods, vintage molds, or framed photos of cacao plantations make the setup more visually engaging. Even a small jar of cocoa nibs or beans adds an authentic touch.
For lighting, I use warm fairy lights or candles to create a soft, inviting glow. The idea is to make the chocolate bar feel like a comforting retreat rather than just a snack station.
Accessories like tasting knives, mini tongs, and dessert plates make serving easier and more hygienic. I keep a few napkins or wipes nearby since melted chocolate can be unpredictable.
Making the Chocolate Bar Seasonal
To keep things fresh, I like updating my chocolate bar with seasonal themes. In summer, I lean toward lighter treats like chocolate-covered fruits or white chocolate with citrus flavors. During autumn, spiced chocolates with cinnamon, chili, or pumpkin notes take the spotlight. Winter calls for rich dark bars, peppermint bark, and hot cocoa mixes.
Valentine’s Day brings heart-shaped truffles, while Easter features pastel-wrapped eggs. Adjusting the display with simple touches like themed napkins or colored ribbons keeps it lively throughout the year.
Hosting Gatherings Around Your Chocolate Bar
A home chocolate bar naturally draws people together. I’ve hosted small gatherings where friends sample different combinations and vote for their favorites. Sometimes we even pair chocolates with homemade desserts like brownies or mousse for an even more indulgent experience.
For family nights, I set up a DIY s’mores station using small burners or candles. Everyone gets to melt chocolate and toast marshmallows at the table. It’s fun, interactive, and leaves everyone smiling.
If you enjoy entertaining, you can take it further with themed events, a “dark chocolate night” or a “world cacao tour.” It becomes more than a food experience; it’s an exploration of culture and flavor.
A Reflection of Personality and Passion
Ultimately, building a home chocolate bar isn’t just about taste, it reflects who you are. The types of chocolate you choose, the way you organize them, and even the atmosphere you create all tell a story. Mine speaks of curiosity, comfort, and a lifelong affection for the art of chocolate making.
The process of setting it up reminded me that indulgence doesn’t have to be complicated. A few thoughtful choices, a touch of creativity, and a willingness to share are all it takes. Whether it’s a quiet evening alone or a lively gathering with friends, my home chocolate bar always feels like the sweetest corner of the house.
It’s a place that celebrates not just the flavor of chocolate but the emotion behind it, the comfort it brings, the joy it inspires, and the sense of wonder it evokes with every bite.