How to Make Artisan Chocolate Bars at Home

Making artisan chocolate bars at home is one of the most satisfying experiences for anyone who loves desserts. There’s something incredibly rewarding about transforming raw cocoa or high-quality chocolate into a glossy, flavorful bar that tastes like something straight out of a specialty shop. Crafting your own chocolate bars allows you to control the flavor, texture, and ingredients, giving you endless possibilities to experiment and refine your taste.
Over time, I discovered that making chocolate bars from scratch is not as intimidating as it seems. With patience, good ingredients, and the right techniques, you can create smooth, rich chocolate bars that rival anything store-bought. From tempering the chocolate to adding personalized toppings, the process feels like a balance of science and creativity.
Choosing The Right Chocolate Base
The foundation of any good artisan chocolate bar is quality chocolate. For home chocolate making, I prefer couverture chocolate because it has a higher cocoa butter content, which results in a smoother and shinier texture. You can also use high-quality dark, milk, or white chocolate depending on your preference.
Dark chocolate is ideal for those who enjoy deep, rich flavors with subtle bitterness. I usually work with chocolate that has around 70% cocoa content for a balanced taste. Milk chocolate, on the other hand, is creamier and sweeter, making it a great choice if you plan to add nuts or caramel. White chocolate doesn’t contain cocoa solids but offers a silky base for fruity or floral additions.
Before starting, I always taste the chocolate I’m going to use. If it’s not delicious on its own, it won’t improve after melting. The goal of artisan chocolate is to highlight quality and purity, so using premium chocolate is the most important step.
Equipment You’ll Need
Making chocolate bars at home doesn’t require industrial tools, but having the right equipment ensures consistency and precision. Here’s what I keep on hand:
- A digital kitchen scale for accurate measurements
- A thermometer (preferably digital) for tempering chocolate
- Heatproof bowls for melting
- A spatula or scraper
- A double boiler or microwave for melting chocolate
- Chocolate bar molds made of silicone or polycarbonate
The molds make a big difference. Silicone molds are more flexible and easy to work with, while polycarbonate molds give professional-looking results with a glossy finish. I like to polish mine with a clean, dry cloth before pouring the chocolate, as this enhances shine and smoothness.
Melting The Chocolate
Melting is the first technical step. The goal is to melt the chocolate evenly without burning it. I usually use the double boiler method to control the heat better. I fill a pot with a few inches of water and place a heatproof bowl on top, ensuring the bottom of the bowl doesn’t touch the water. Then I add chopped chocolate and let it melt slowly, stirring occasionally.
If you prefer using a microwave, heat the chocolate in short 20-second bursts, stirring in between each interval. The key is to melt it gradually; rushing can cause the chocolate to seize or develop a grainy texture. Once it’s melted and smooth, it’s time to temper.
Tempering Chocolate For Shine And Snap
Tempering is the process that gives chocolate its glossy surface and that satisfying snap when you break it. It may sound complicated, but once you understand the basic temperature curve, it becomes second nature. Proper tempering aligns the cocoa butter crystals so that the chocolate sets perfectly at room temperature.
For dark chocolate, the ideal tempering range is:
- Melt to 115°F (46°C)
- Cool to 82°F (28°C)
- Reheat to 88–90°F (31–32°C)
For milk and white chocolate, the range is slightly lower:
- Melt to 110°F (43°C)
- Cool to 80°F (27°C)
- Reheat to 86–88°F (30–31°C)
I use a digital thermometer to monitor the temperature closely. To temper by hand, I pour two-thirds of the melted chocolate onto a cool marble surface and use a spatula to spread and fold it repeatedly until it thickens slightly. Then I return it to the remaining one-third of melted chocolate and mix well to bring it up to working temperature.
If you don’t have a marble slab, you can use the seed method instead. Add small pieces of unmelted chocolate (about 25% of the total weight) into the warm, melted chocolate and stir constantly until it cools to the correct temperature. This method is easier and works well at home.
Testing The Temper
To test if the chocolate is properly tempered, I dip a knife or spoon into it and leave it at room temperature for a few minutes. If it sets quickly with a smooth, shiny finish and no streaks, it’s ready to use. If it looks dull or streaky, it means the temperature wasn’t quite right, and I reheat or cool it slightly to fix the temper.
Tempering may feel like a delicate dance at first, but with practice, it becomes intuitive. Once the chocolate is tempered, I work quickly because it starts to set as it cools.
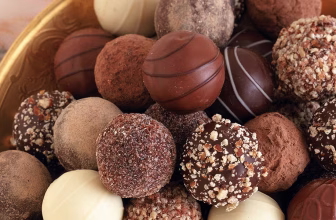
Adding Flavors And Texture
This is where creativity shines. Artisan chocolate is all about personal expression, and you can flavor it in countless ways. Sometimes I mix in a hint of sea salt or espresso powder to deepen the flavor. Other times I add spices like cinnamon, chili, or cardamom for warmth and complexity.
If I’m using inclusions such as nuts, dried fruit, or caramel pieces, I make sure they’re dry and at room temperature to avoid interfering with the temper. I also toast nuts beforehand to enhance their flavor. My favorite combinations include dark chocolate with almonds and sea salt, milk chocolate with hazelnuts, and white chocolate with freeze-dried raspberries.
You can also experiment with essential oils or natural extracts like peppermint, orange, or vanilla. A few drops go a long way and can completely transform the character of the chocolate bar.
Pouring The Chocolate Into Molds
Once the chocolate is tempered and flavored, I pour it into the prepared molds. I tap the molds gently on the counter to remove air bubbles, which helps prevent holes or uneven surfaces. If I’m adding toppings like crushed nuts, coconut flakes, or edible flowers, I sprinkle them immediately before the chocolate starts setting.
The chocolate should cool and harden at room temperature in a cool, dry area. Avoid refrigerating it unless absolutely necessary, as condensation can dull the finish. Depending on room temperature, it usually takes about 30 to 60 minutes to set fully.
Once set, I gently flex the mold to release the chocolate bars. The glossy surface and clean snap are the best signs that the tempering worked perfectly.
Decorating And Packaging
Presentation plays a big role in making homemade chocolate feel truly artisan. I sometimes drizzle tempered white or dark chocolate in thin lines across the top for contrast. For a more rustic touch, I might dust the surface with cocoa powder or edible gold dust.
Packaging matters just as much as taste. I wrap each bar in parchment paper or foil and finish it with a decorative band of craft paper. Labeling them with handwritten notes or flavor tags makes them look elegant and personal, especially if I plan to give them as gifts.
Experimenting With Cocoa Origins
One of the most fascinating aspects of artisan chocolate is exploring cocoa from different regions. Each origin has unique flavor characteristics influenced by soil, climate, and processing. I love experimenting with chocolates made from beans grown in Madagascar, Ecuador, or Ghana.
Madagascar chocolate tends to be bright and fruity with hints of berries, while Ecuadorian varieties are more floral and earthy. Ghanaian chocolate usually delivers a bold, traditional cocoa flavor with a hint of nuttiness. By trying different origins, you can create a collection of bars that showcase the diversity of chocolate itself.
Making Bean-to-Bar Chocolate
For those who want to take their chocolate-making to the next level, starting from cocoa nibs or beans is the ultimate challenge. It requires more equipment and patience but gives you total control over the process.
To make bean-to-bar chocolate, you begin by roasting cocoa beans to bring out their flavor, then cracking and winnowing them to separate the nibs from the shells. The nibs are ground into a paste called chocolate liquor, which is then refined, conched, and tempered before being poured into molds.
While I don’t always go through the full bean-to-bar process, trying it once taught me to appreciate how much craftsmanship goes into making quality chocolate. It also made me more selective about the beans and chocolate I use in simpler recipes.
Avoiding Common Mistakes
Homemade chocolate bars can sometimes run into problems, but they’re easy to avoid with a few tips. If the chocolate looks dull or gray after setting, it’s usually because it wasn’t tempered correctly or cooled too fast. Re-melting and re-tempering usually fixes it.
If your bars have air bubbles, tapping the mold more firmly or using a toothpick to release trapped air before setting can help. If you find streaks of fat on the surface after storage, it’s likely bloom caused by moisture or temperature changes. Keeping chocolate in a cool, dry place around 65°F (18°C) prevents that.
Pairing Homemade Chocolate Bars
Homemade chocolate bars pair beautifully with a variety of foods and drinks. I love pairing dark chocolate with red wine or espresso, milk chocolate with black tea, and white chocolate with champagne or light coffee.
You can also use your bars as an ingredient in other desserts , chopped into cookies, melted for ganache, or grated over ice cream. The depth of flavor from a handmade chocolate bar enhances everything it touches.
The Joy Of Personalization
What makes artisan chocolate special is the freedom to personalize it. I often create themed bars , like a tropical version with coconut and pineapple, or a winter version with peppermint and crushed candy cane. The possibilities are endless.
Making chocolate at home also means I know exactly what goes into it. There are no preservatives, artificial flavors, or unnecessary additives , just pure, flavorful ingredients. Sharing them with friends always brings joy, especially when they realize it’s handmade.
Storing Homemade Chocolate
Proper storage keeps your chocolate tasting fresh and looking beautiful. I wrap each bar tightly and store it in a cool, dry place away from sunlight. Avoid keeping it in the fridge unless the room temperature is too warm, as humidity can cause sugar bloom on the surface.
If stored properly, homemade chocolate bars can last several months, though they rarely last that long in my kitchen. The flavor even deepens slightly over time, much like good wine.
Why Making Chocolate At Home Is Worth It
Making artisan chocolate bars at home goes beyond just a recipe. It’s an experience , a mix of creativity, patience, and sensory exploration. The aroma of melting chocolate, the satisfaction of tempering it just right, and the joy of seeing the glossy bars set perfectly are all part of the magic.
It also gives a deeper appreciation for the craftsmanship behind professional chocolate makers. The care that goes into tempering, flavor balancing, and presentation transforms simple ingredients into something luxurious.
Final Thoughts
Learning how to make artisan chocolate bars at home opens up a world of flavor and creativity. It’s a rewarding process that combines technique with artistry, allowing you to craft chocolate that’s truly your own. From selecting high-quality chocolate to mastering tempering and experimenting with flavors, each step brings its own sense of accomplishment.
Once you experience the joy of breaking into a glossy, perfectly tempered bar that you made yourself, it’s hard to go back to store-bought chocolate. It’s more than just a dessert , it’s a reflection of your creativity, patience, and passion for flavor. Whether you gift them, share them, or savor them alone, artisan chocolate bars made at home carry a touch of craftsmanship that makes them unforgettable.